5 Easy Ways To Improve Webcam Quality
Hayley Spooner, Jun 20, 2022
You’re on an important Zoom call for work, and you realize that all your colleagues have crystal-clear video, while yours looks like you’re using a potato for a webcam. Oof. It’s not the polished, professional image you want to project, but there are some simple fixes that can improve your webcam quality—and you don’t even need to be technically inclined to make them work.
Key Takeaways
- Improve webcam quality by adjusting your camera settings, understanding the best lighting conditions for video, optimizing your audio output, and improving your video background.
- If your computer’s webcam isn’t working properly, you can upgrade to a smart all-in-one video conference device.
- Neat devices are purpose-built for hassle-free video collaboration.
How to make your webcam look better
If you work from home often, you may find that your webcam quality isn’t quite what you’d like it to be. (The potato camera struggle is real, friends.)
Flexible work days, hybrid schedules, and working from home full-time aren’t just trends—they’re the present and the future of work. This means that image quality matters, as video meetings are often your only chance to visually interact with colleagues and clients. When your webcam streams dark, grainy video, it underlines the disconnection people often feel in video meetings; when picture and audio are optimized, people feel connected and together.
Here’s how to improve webcam quality without having to call in your IT department.
1. Adjust webcam settings
The first thing you can do to improve webcam quality is to optimize your settings. You can do this in two ways: through your computer’s operating system or through the webcam software itself.
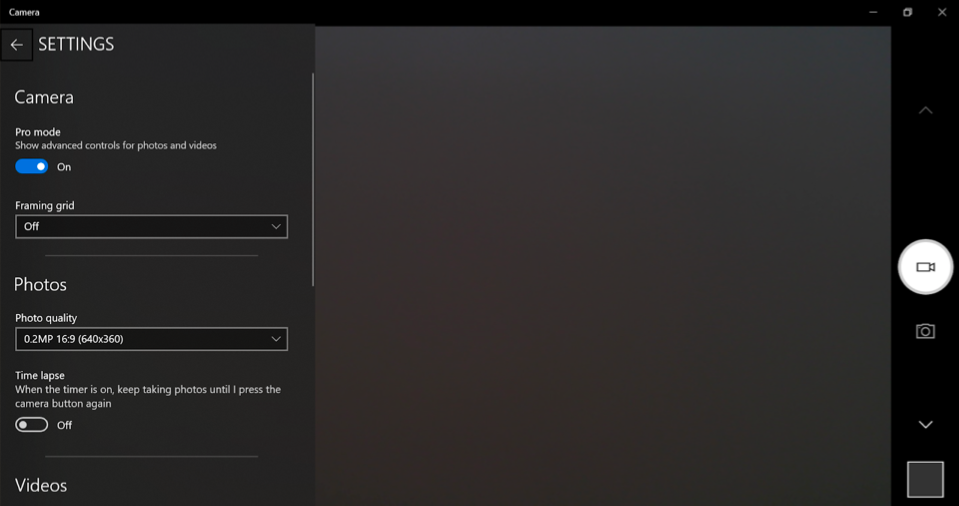
For both Windows and Mac, there are a few key settings you can adjust to improve video quality. In Windows, go to Start > Camera > Settings and make any changes you need. From here, you can adjust video resolution, framing grid and a few other basic settings. Enable Pro Mode at the top of the settings menu to adjust brightness.
If you have a Mac with a built-in webcam, it’s a little more complicated. There are no built-in camera settings for the webcam, so you’ll first need to install a third-party app. The Webcam Settings and iGlasses apps are two popular options. Once you’ve chosen an app and installed it on your Mac, you can adjust brightness, contrast, aperture and more.
If you have webcam software installed on your computer, you can also access settings like exposure time and white balance. If your software doesn’t have these options, try downloading a different one that does. Here are some highly-recommended software options for both Windows and Mac.
Some video conferencing programs will also allow you to make settings adjustments. Zoom, for example, lets you adjust for low light, apply filters, and even has a touch-up feature. If you use the same conferencing program for all of your calls, this is a simple solution that doesn’t require any additional software installations.
Know the best settings for your webcam
Want to know how to improve laptop camera quality? Unlike smartphone cameras, laptop and computer webcams often need manual adjustments. Some common settings are:
- Brightness – The overall lightness or darkness of the image.
- Contrast – The degree of difference between the lightest light and darkest dark.
- Saturation – The intensity of colors.
- Hue – The color tone of the image.
- Gamma – How bright mid-tone colors appear.
- Sharpness – The clarity of detail in an image.
- Range – The contrast ratio between the darkest and brightest tones the webcam can capture.
- White balance – An adjustment that allows whites to look white by removing unwanted color casts. Presets like Daylight or Indoor Lighting can help you quickly adjust this setting.
- Gain – The sensitivity of the camera sensor. A higher gain will make the image brighter, but it can also cause noise.
- Resolution – The number of pixels in the image. A higher resolution will result in a sharper image, but it can also decrease frame rate.
- Frame rate – The number of frames per second that the camera captures. A higher frame rate will result in a smoother video, but it can also decrease resolution.
Some webcams also support other settings, such as Zoom, Exposure, Aperture, Pan, Tilt and Rotate. Neat offers users a unique webcam experience with additional features like Neat Symmetry, which presents everyone in the room equally close, Neat Boundary to define your meeting space and Neat Audio Processing for clear, crisp dialogue.
Keep in mind that there’s no right or wrong when it comes to webcam settings. You’ll need to play around with the settings to find what looks best. As light changes in your room or when you move your laptop, you may need to change your settings again. The time you spent tweaking your settings may be for naught once storm clouds roll in or the afternoon sun hits your workspace!
This brings us to our next topic…
2. Optimize lighting
If you find that your videos are dark and shadowy or so grainy that they look like security camera footage from a bank heist, try adding more light to your room. You can achieve this with lamps or sunlight—just be careful not to add so much light that it washes out your video output. Understanding lighting is key if you want to know how to look better on webcam.
Daylight is the best source of light, so whenever possible, use the natural light that comes in through a window. Position yourself to face the window and never sit with your back to it.
If you must use artificial light, overhead lighting is not ideal because it can cast harsh shadows.
One artificial lighting setup that works well is placing two lamps on your desk to illuminate your face from both sides. To keep the lighting from being too harsh, you can put a simple piece of printer paper in front of each lamp to diffuse it. A second option is to face the lamps toward white walls. The light will bounce back to illuminate your face, and the lighting will be softer than if you positioned the lamps towards your face directly.
You can also try adjusting the position of your webcam. If it’s pointing directly at a light source, it will result in a darker video. Try angling the webcam so that the light hits it from the side instead.
If these tips don’t help and you have video meetings often, you may want to purchase an inexpensive ring light.
3. Assess microphone quality
The quality of your microphone can make a big difference in the overall quality of your webcam videos. If you’re using the built-in microphone on your computer and your sound output is unclear, try switching to an external microphone. External microphones are usually more sensitive and will pick up your voice better than the built-in option.
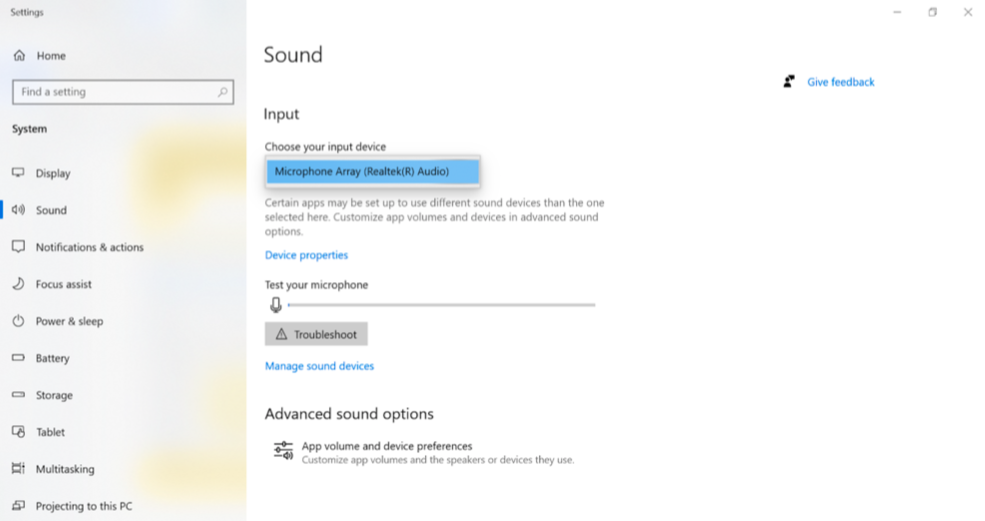
You can also try adjusting the settings on your microphone to reduce background noise. In Windows, go to Start > Settings > System > Sound. Select your microphone in Input, then adjust the settings as needed.
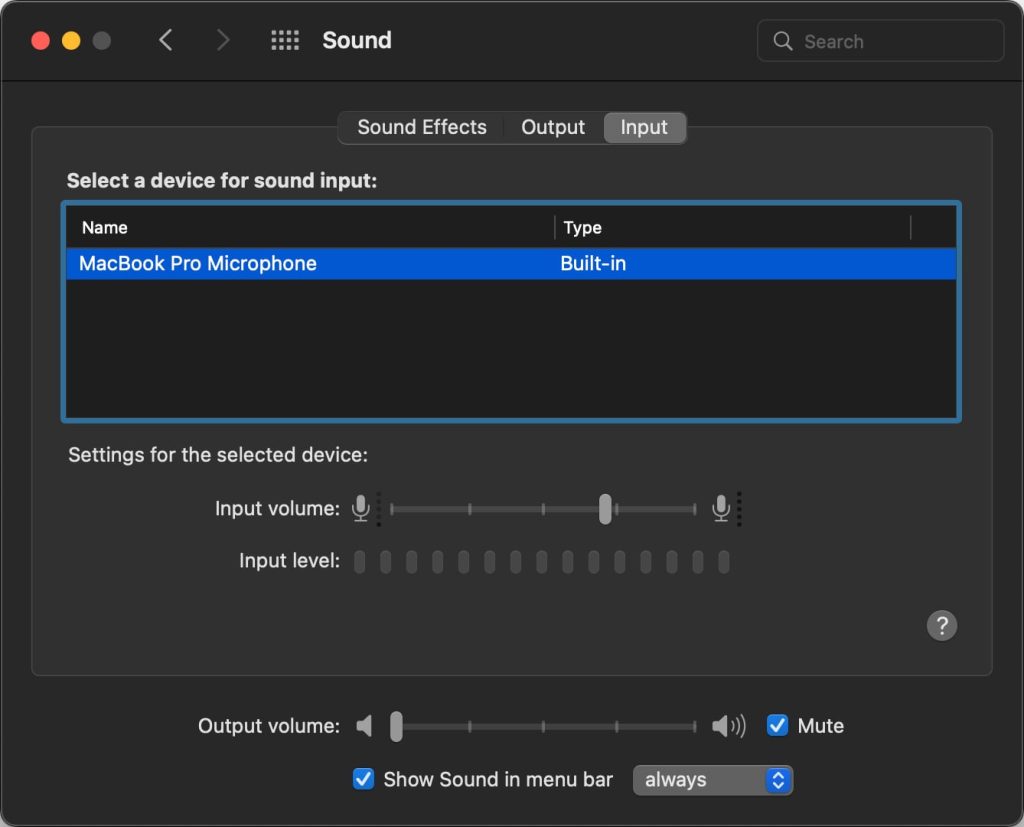
In Mac, go to System Preferences > Sound > Input. Select your microphone from the list (if you don’t have an external microphone, your internal microphone will be listed as Display Audio), then use the sliders to adjust your microphone volume and sensitivity to background noise.
Another important point to consider when it comes to sound is your speaker—if you have the audio from your meeting playing through your computer speaker, it can create an irritating sound loop that makes it difficult for others to hear you clearly. This is known as double-talk, and it can be incredibly distracting in meetings.
Using wireless earbuds will prevent this. Alternatively, you can use a headset with a microphone if your computer’s built-in microphone is lacking.
4. Check your background
A final way to improve webcam quality is to pay attention to your background. Attending a virtual meeting with a cluttered or messy background makes you look unprofessional. Empty coffee cups or haphazard stacks of papers send a message about your organizational skills—and it’s probably not the message you want to be sending.
Remove clutter and visual distractions from your space before your meeting. A blank wall works better than a mess. You can also position yourself in front of a tasteful piece of abstract artwork or a shelf styled with plants and a decorative object or books. Another option is to add a professional-looking background via Zoom or Teams.
The color of your background matters, too. Neutral tones are best, but that doesn’t have to mean white—light gray, navy blue or a pale shade of pink will all work well. Bright colors like red, orange or yellow are unflattering and best avoided.
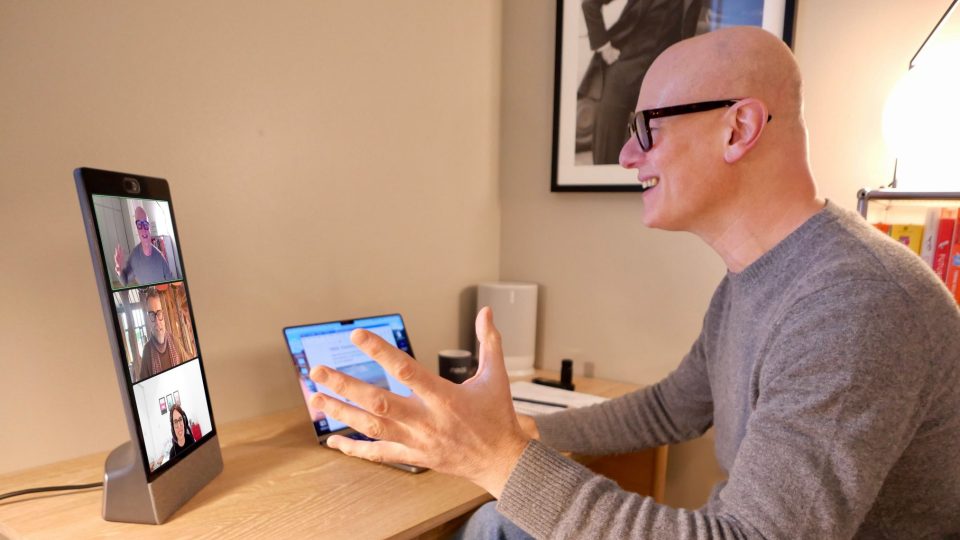
5. Level up your technology
By investing in the right technology in the first place, you can avoid the hassle of trying to improve your webcam quality every time you have a video conference. If you didn’t start with the right technology, it might be time to consider an upgrade to help you keep up to speed with the demands of modern-day workstyles.
Consider upgrading to a multi-functionality device like Neat for the best webcam quality available. Whether it’s Neat Bar or Neat Bar Pro, or the sleek Neat Board, all Neat devices have built-in webcams that produce crystal clear 1080p video and audio.
What makes Neat unique is that it offers ways to improve webcam quality that aren’t even possible with a traditional webcam and completely transforms the experience of video conferencing:
- Neat has a larger field of view to include an entire conference room
- Neat Boundary allows you to exclude any areas of the room that you don’t want in the picture
- Neat automatically frames the faces of attendees so they can move about freely while always remaining in focus.
Best of all, Neat is a plug-and-play solution that provides superior video quality out of the box. No more adjusting webcam settings throughout the day or worrying about whether your audio output is clear. Neat takes care of it all for you. Sounds fabulous, right?
References
How to use the Camera app. Microsoft.
How to adjust webcam settings on your Mac. Macworld.
5 easy ways to improve the lighting during your video calls. USA Today.
Fix microphone problems. Microsoft.
Change the sound input settings on Mac. Apple.
Improving poor video quality. Zoom.
Best Webcam Software. iSkysoft.